Baby

Umbrella Trimmings Softie

May 29, 2013


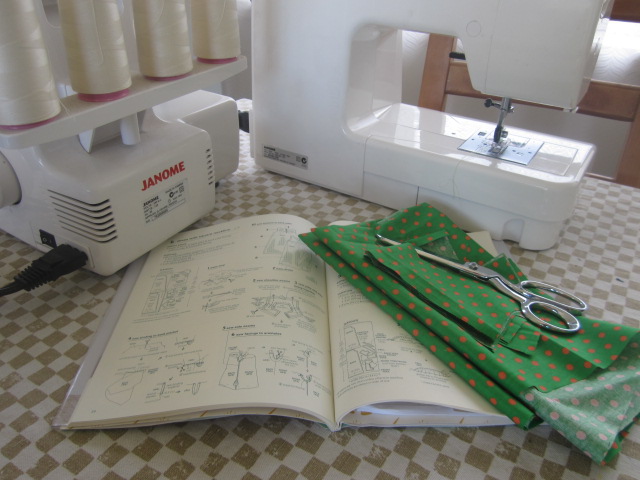
A couple of months ago I bought an Umbrella Trimmings pack intending to enter this competition.  The pack sat in my 'to do' pile for months, and with days to spare before the competition closes, I decided to finally make this softie.  The Trimmings pack is essentially a little pack of offcuts of random prints from the Umbrella Prints range. The pieces range in size from 3 x 15cm to about 10 x 12cm.  My pack started it's life looking like this...


Chop, sew, chop, sew, stuff, stitch...
 

My good friend had a baby boy on the weekend, and since I would make her a gift anyway, the trimmings pack was perfect for a little softie.  It has been ages since I have made a softie.  I made this one up as I went.  Yes he has pink on him and this is for a little boy, but this little boy has two older sisters, so he better get used to pink!  The only fabric that is not from the pack is the beige linen for the face.  The  nose is pink suede.

 
Umbrella Prints is a lovely South Australian screen printing business that make beautiful fabrics.  You can read about the competition in the link above.  I will be checking out the Umbrella Prints pinterest board over the weekend to have a look at some other creations.  The winner receives $300 of gorgeous Umbrella Prints fabric!  Fingers crossed...

Linking up with My Creative Space today.
 
**Sorry Umbrella Prints - the pic of the fabrics is not my best (taken with my old camera a few months ago).  The softie shows off the fabrics much more honestly! 
 

sewing for children

How to make a scrappy gathered skirt

May 18, 2013


Today I made this sweet little skirt for Isabella.  It is a very simple project - one for beginner sewers.  It takes a bit of time to put together but there are no complicated techniques.


It is gathered at the waist with one row of elastic.  The skirt is lined - with the lining peaking out below the hemline.  The hem is edged with two rows of ric rac.

You will need...

1.  Scraps of fabric for outer layer - you will need them to be the skirt length you like plus 5cm.  You will need enough to allow for a skirt that is about three times your child's waist circumference in width.
2.  Lining-  I lined my skirt.  Again you will need the desired length of your skirt (I added an extra 2cm than my outer layer as I wanted my lining to peak out the bottom).  You will need the same skirt width as your outer layer - approx. 3 x waist... but cut your lining after your outer layer is assembled.  For example, Isabella's waist measurement was 57cm, so I used 180cm in length of lining.  You don't need to buy 180cm of lining though.  Fabric is usually 115 - 150 cm in width.  With a seam, you could achieve the required amount for Isabella from twice the skirt length (ie. 45 x2), so you would need 90cm off the roll of fabric.
3.  Some 2.5 mm width elastic (You will need 10cm less than your child's waist circumference).
4.  Ric rac - 3 x waist measurement again.
5.  Pins and safety pin.

How to make...

1.  Measure your child's waist.  Isabella's was 57cm.
2.  Measure the skirt length you would like: measure from waist to finished hemline - add 5 cm (this includes 4 cm for waist and 1 cm for hem).  I wanted Isabella's skirt to be 40 cm long so I cut 45 cm strips of fabric.
3.  Cut several pieces of fabric at differing widths at 45 cm in length.  Iron your pieces before sewing.

My cut pieces looked like this...I paid little attention to matching colours/patterns.


Start sewing your pieces together down the long edges (with right sides together).  Neaten each seam.

 
Repeat this process until you have a strip of pieced fabrics that will look something like this.  My length of fabric now is 180cm (So a little more than three times Isabella's waist circumference).


Ta da!  Hope you like it!
 

Linking up with Sew Country Chick and also taking part in Skirt Week with this one at Crafterhours.

Dollhouse

eeni meeni

January 24, 2013


I have been having a ridiculous amount of fun over the past few weeks renovating a dollhouse.  The playgroup I have been a part of for nearly three years (and co-run for two) was disbanding due to kinder commitments this year and the organisers of the space where we ran it actually requested that we disperse all the toys that belonged to the group as they were needing to re-organise their space.  Most of them were donated to another group but we each got to keep a few toys.  I was very lucky to claim an awesome wooden dollhouse.  I received it a week or so before christmas and set to work painting, wallpapering, sewing, sanding, superglueing, fimo styling and rearranging.  The girls wake each morning and peer inside the house to see what Mummy got up to the night before!

Today I made an eeni meeni quilt for the smallest member of the family that reside in said house.  Little Joey.  The quilt is not sewn on top but I wanted to have a go at making a little quilt just using cut pieces and vialene.  I used scraps from Emily's Children at Play quilt.  

I am very excited to share the completed dollhouse next week on my blog.  Stefan thinks I have gone a bit mad and am turning into a strange miniature lady!


Linking up here today.


Juliette's quilt

Juliette's quilt - Part I

January 12, 2013

After some teething issues, Juliette is finally in her big girl bed.  Which means I need to get cracking with her quilt.  I started it a while back but it has been on the back burner for the last couple of months.  I wanted to get back to the true roots of patchwork with this quilt by making something to keep my girl warm from scraps I already had.  So far, I have only spent about $20 on the quilt.  Most of the fabrics come from my stash with some generous donations from my sister Jules.


I wanted a soft, feminine quilt so have chosen pastel florals, solids and prints.  I am not being fussy with placement (apart from alternating each square with the cherry and cream floral).  The pieces are approx. 10cm squared.  I have estimated that I will be sewing approximately 540 squares together!  Sounds like a marathon but I have got an efficient little system of sewing worked out.  I sew pairs one after another on the machine, then snip threads and join two pairs together to make quadruples.  Then I piece the quadruples together to make strips.  


I like that I can use special little favourite pieces and some pieces with a bit of history.

I am starting to wonder what I will do when I have no more quilts to make??

Collections

Colourful collections and some pencil tins

October 18, 2012


The girls and I started collecting little bits and pieces from around the house yesterday and in the spirit of Kootoyoo, I took this fun photos.


We then played shops and I became the "copsheeper" while the girls filled their baskets with colourful wares.

 
I also made these this week - some little tin can covers for pencils.


My budding artist at work...
 
Linking up here today.

Baby

kcwc: Day two - Two little bibs

October 09, 2012


I'll be posting on projects the day after I sew them as I do most of my sewing at night so they will be photographed the following day.

On my first day of the kids clothes week challenge I made these two bibs for Emily.   I love a project that decreases (ever so slightly) the size of my scrap box.  I have had the main pieces of fabric for these bibs in my stash for about four years.  They were both not wide enough for a real garment but could be used here.  I traced the bibs from one of Emily's that I always reach for because of its good shape and closeness to her neckline (so no food slops on her collar!).  The one on the left is backed with polar fleece and the one on the right with jersey.  I like something soft on the underside to mop up any mess on little baby faces!  I made the binding myself which added some time to putting these together.

 
Emily is pretty happy about her new bib and it is now in the wash!
 
Project details:
Pattern - traced from own bib
Fabric - all from stash
Cost - I didn't outlay any cash for these babies but they probably cost around $2 per bib
Time taken - about an hour and a quarter for both bibs (applying the bias was fiddly!)
 
A sneak peek at my next project....
 
 
A dress for Juliette which I will hopefully have pressed and photographed for tomorrow's post!
 

Quilts

Dolly quilt

June 07, 2012

I have finally got around to putting pics of this little project I completed a while back.  I gave the girls' cradle a new coat of paint and fitted it out with a little mattress, pillow and quilt.
I made the quilt from fabrics in my stash.  I like the candy style colour scheme.
It's backed with some Sherbet Pips puppy dogs.

Meanwhile, I'm busily working on Emily's quilt - grabbing five minutes here and there, between spinning plates, trying to get it finished!  I'm linking up here today.

Sewing

The Emily Button Project - Chapter One

May 17, 2012


Isabella is in love with these two 'Emily Button' books.  She loves reading them and has requested them every night for the past two weeks.  She knows most of the stories by heart and I have not seen her as excited about any other stories.  These two books were given to her by her Aunty, Uncle and cousins in the UK as a Christmas gift.  They lay quietly on the book shelf for a while, but once they were discovered, we have not heard the end of Emily Button!  Luckily Stefan and I like the books too - they are really sweet.

The main character is of course, Emily Button, who is a 'real live rag doll' and she saves the day with bits and pieces she keeps in her pocket. 


Her sidekicks, Bobble and Mousey the Mouse help her along the way.

Since my crafty mojo has been creeping back, I am starting to think of birthday gifts for Isabella (late July), and thought how much she would love a handmade Emily Button, Bobble and Mousey.  So, as much for my enjoyment as for hers, I have decided to embark on 'The Emily Button Project' where I will make all three characters as true to the stories as I can. 

Stage 1.
Drawing and deciding sizing of characters...

Stage 2.  Deciding on patterns and fabrics...
Emily - I plan on using Fiona Dalton's Poppy doll pattern as a guide for Emily, although she will be shorter and her head will be longer.  I have sure had some mileage out of that awesome pattern.  I have some beautiful cream wool flannel which I will use for her body and face.  I will have to get my hands on some good quality pink wool felt for her hair and will make the two outfits that appear in the book (equipped with little bits and pieces for her pockets of course!).  I will mostly use scraps from my scrap box for her outfits but might have to buy a few bits and pieces.
Bobble - His face and body are knitted in two shades of pink.  I have wool that will suit and will have to knit the body and face.  I will make up the pattern for him and use scraps from my scrap box for his limbs, tail and ears.
Mousey - This guy will be the quickest and easiest.  I will use button/hinge joints for his arms and legs so he can sit and (hopefully) stand.  Fabrics from scrap box.

Stage 3. To be continued...

These books are sold through the Marks & Spencer chain, and unfortunately you can only order them through their site.  Through my little internet search the other night, I found there are two other books which I will see if Isabella's Nan can find and send to us for her birthday - let's hope she still loves the books then!

For my creative eye candy, check out Our Creative Spaces.

Quilts

Scrappy quilt - Part IV

January 26, 2012

I picked up my scrappy quilt again a few days ago and decided to try to get moving with it.  The squares have been sitting under my overlocker for the last six months keeping warm!  I sorted out six more colour lots aiming to complete 16 squares in total to make a 4 x 4 square quilt.
Some sewing, ironing, cutting, sewing, ironing, cutting later, I finished three more squares.  The brown one above and these two below...
So now I have 13 squares done and only three left to go!
This is definitely a children's quilt and I have put too much work into it to give it away, so I think it will be a floor quilt for the girls' bedroom.  I'm planning on connecting the squares with white with coloured posts at the intersections.  I think scrappy binding is the only thing that will suit - more work but it will hopefully be worth it in the end!!

The original idea for this quilt was from Aneela at Comfort Stitching - I wonder if she ever got hers finished?!  I'm linking up today with Our creative spaces.

Baby quilt

Baby's quilt!

January 19, 2012

I am very pleased with how quickly and nicely this little quilt came together.  I cut out the pieces a few months ago and had them stacked in my sewing box for when I had some spare time.  I decided to use up scraps of all sorts of colours, alternating with soft white for our bub. 
The back is a grey and white spot.  I was planning on machine quilting this quilt but since my sister had borrowed my quilting foot, I decided not to wait and to do a tacking stitch with red embroidery thread - I love how it turned out! 
The quilt is just a cradle/floor/pram quilt (80 x 80 cm) as I want to spend more time pouring over fabrics once baby is born and we know the sex!!  I will most likely be using some of this fabric in the next quilt...

For girl...

For boy...

These fabrics are by Sarah Jane Studios - an awesome illustrator who has turned her hand to fabric design.  Cute stuff!

I'm sharing today over at Kootoyoo.


Crafting with kids

Getting ready for baby

January 15, 2012

It's been a while since I've paid some attention to my blog...Christmas, holidays, baby bump growing and a sewing lull (burnt out after too many Christmas gifts?).  I thought I would post about some baby preparations.  I feel I need to put some of my creativity now into preparing for baby, with only seven-eight weeks to go!  Here is where baby will sleep.  I painted up some letters and little elephants - both from bunnings, to dress up the wall.  Spot the cute new bird hanging from the ceiling.  
The little bird is yet another Hop Skip Jump pattern (gee I am getting some mileage out of that book!).  It was super easy and fun to make.  I made mine from cream linen, cotton scraps for the tail feathers and a teeny bit of orange wool felt for the beak.  He is hung with thin fishing wire - which was thin enough to be sewn onto the back of the bird then suspended from the ceiling.
Here is the first garment I have made for baby - a soft grey marle cotton bonnet.  Since we don't know the sex, soft grey is calling as the colour of the moment - think I will knit a little cardi from the same cotton.  As we will be having an (early) March baby, the weather may not call for bonnets and cardis but baby's do tend to be colder than us big people, don't they?  The pattern is from Vintage knits for modern babies by Hadley Fierlinger.