la maison victor

la maison victor - part two...an unintentional mini Dalores skirt!

September 19, 2017


Hello! So this is post number two for the La Maison Victor blog tour. You can read all the details about La Maison Victor in my previous post here.  For this post, I am sharing the first Dalores skirt I made (which ended up just a little on the short side), along with a Miss Polly dress I made for Emily so we could twin!  As outlined in my previous post, I hadn't realised until after the fact, that the Dalores pattern uses two pattern sheets to achieve the length, so this skirt is the shortest length outlined in the pattern , but is still 20 cm shorter than intended...Oops! Anyway, I still like it and will wear it lots!

Kid's Clothes Week

KCW: Cats meow skirt

October 27, 2013

 
Following on from my theme of being a pinterest inspired kids' clothes week, I made Isabella this 'Cats meow skirt', inspired by this pin...

 
After seeing this image, I knew Isabella would loooooove a skirt like this!! She loves animals and she loves pretending to be an animal - particularly - cats, dogs, rabbits and foxes!! We also have a cat, so making her a cat skirt was sure to be a good idea... 

 
I made the skirt and showed Isabella.  Her eyes lit up and she wanted to put it on before it was finished.  I quickly threaded the elastic through, finished it off and gave her our cat mask and asked would she mind if I took some photos of her in her cat skirt pretending to be a cat....yeah...she thought she could manage that! 
 
 
I used the Oliver + S Sunday brunch skirt pattern and just added ears when sewing the waistband on.  I then hand-stitched the whiskers with 6 strands of embroidery thread and sewed on brown button eyes and a rusty pink button nose (at Isabella' request).  The fabric is a lovely midnight blue velvet which was given to me by a lovely friend.  The pocket lining is a sweet navy and white spot.
 
 
Oh yeah...she loves the skirt!  And I have to admit, Issie looks rather Wonder Womanish with her red boots!!


I know this is one that Isabella will want to wear again and again.  It feels good to sew something they love!

sewing for children

How to make a scrappy gathered skirt

May 18, 2013


Today I made this sweet little skirt for Isabella.  It is a very simple project - one for beginner sewers.  It takes a bit of time to put together but there are no complicated techniques.


It is gathered at the waist with one row of elastic.  The skirt is lined - with the lining peaking out below the hemline.  The hem is edged with two rows of ric rac.

You will need...

1.  Scraps of fabric for outer layer - you will need them to be the skirt length you like plus 5cm.  You will need enough to allow for a skirt that is about three times your child's waist circumference in width.
2.  Lining-  I lined my skirt.  Again you will need the desired length of your skirt (I added an extra 2cm than my outer layer as I wanted my lining to peak out the bottom).  You will need the same skirt width as your outer layer - approx. 3 x waist... but cut your lining after your outer layer is assembled.  For example, Isabella's waist measurement was 57cm, so I used 180cm in length of lining.  You don't need to buy 180cm of lining though.  Fabric is usually 115 - 150 cm in width.  With a seam, you could achieve the required amount for Isabella from twice the skirt length (ie. 45 x2), so you would need 90cm off the roll of fabric.
3.  Some 2.5 mm width elastic (You will need 10cm less than your child's waist circumference).
4.  Ric rac - 3 x waist measurement again.
5.  Pins and safety pin.

How to make...

1.  Measure your child's waist.  Isabella's was 57cm.
2.  Measure the skirt length you would like: measure from waist to finished hemline - add 5 cm (this includes 4 cm for waist and 1 cm for hem).  I wanted Isabella's skirt to be 40 cm long so I cut 45 cm strips of fabric.
3.  Cut several pieces of fabric at differing widths at 45 cm in length.  Iron your pieces before sewing.

My cut pieces looked like this...I paid little attention to matching colours/patterns.


Start sewing your pieces together down the long edges (with right sides together).  Neaten each seam.

 
Repeat this process until you have a strip of pieced fabrics that will look something like this.  My length of fabric now is 180cm (So a little more than three times Isabella's waist circumference).


Ta da!  Hope you like it!
 

Linking up with Sew Country Chick and also taking part in Skirt Week with this one at Crafterhours.

Kid's Clothes Week

Kid's Clothes Week - Day One

April 22, 2013


I decided to get back into the sewing this week, and just in time for Kid's Clothes Week.  I took part in Elsie Marley's sewing challenge last October and found it a great motivator to get heaps of sewing done as well as a great way to uncover some great blogs.  The idea is that you sew for your children (or others'!) for one hour a day for one week..

 
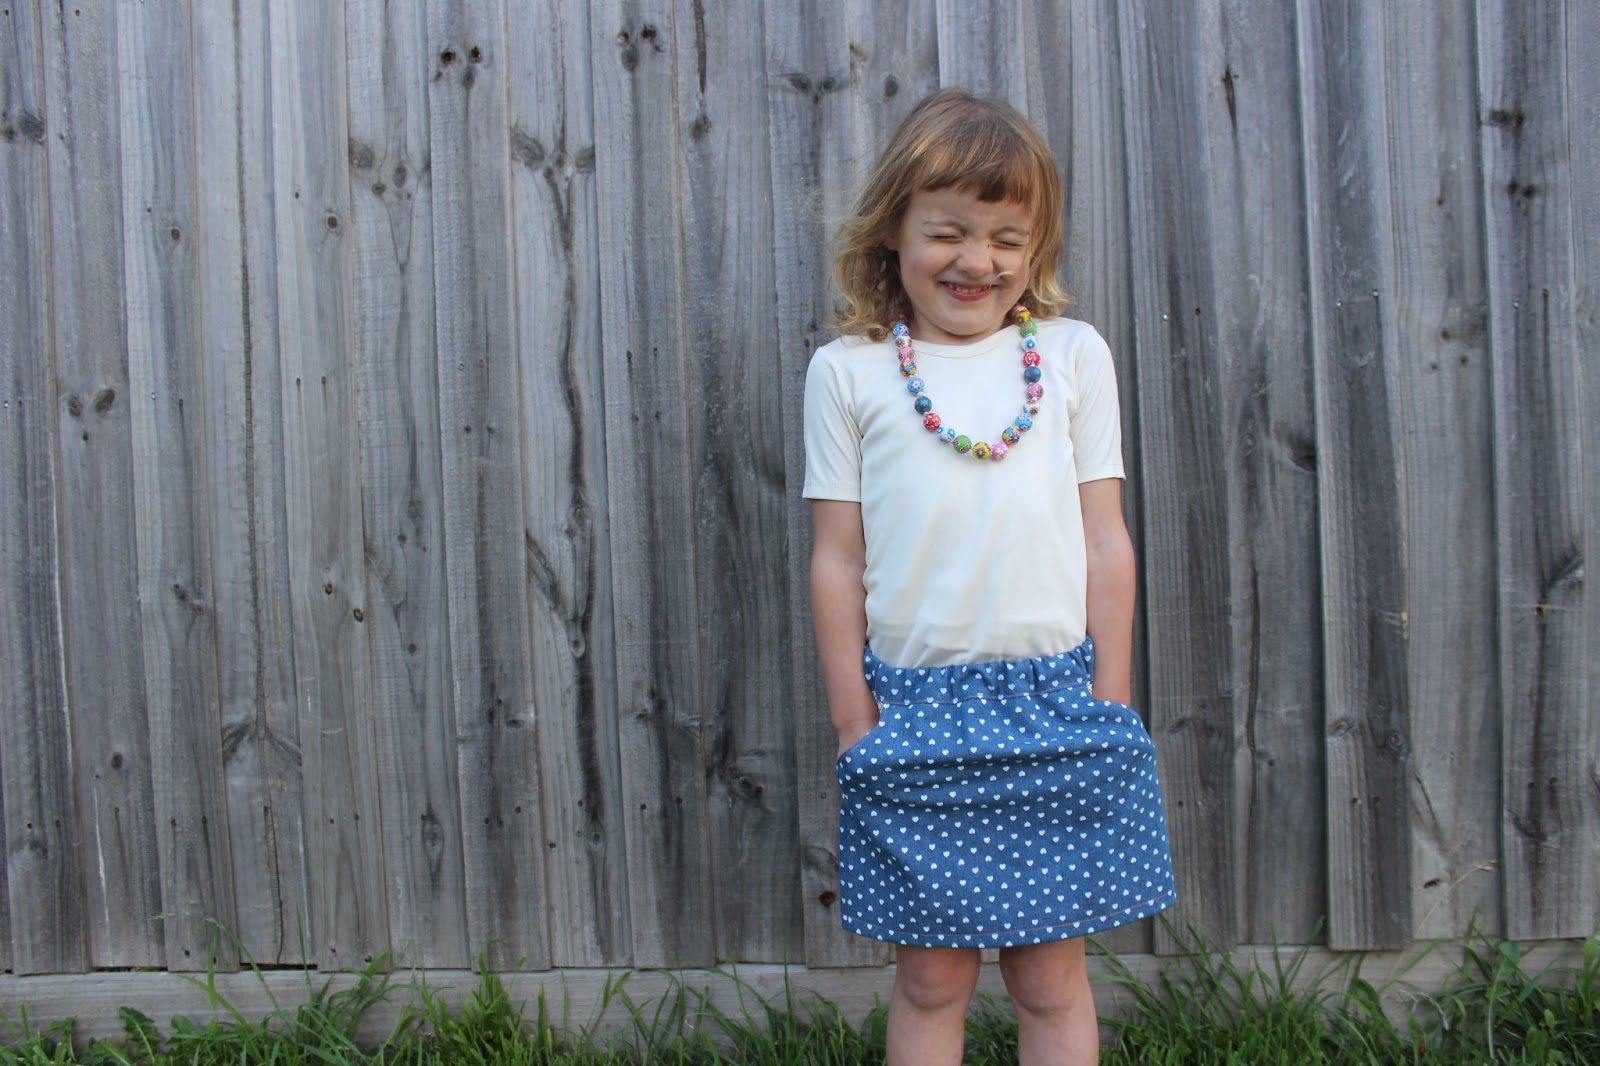
The first thing I have sewn for the week is the Sunday Brunch Skirt by Oliver & S.  I have made this skirt a few times and think it is such a cute little pattern.  Simple, sweet and comfy.  I had just enough heart printed denim left over from my Perennial Dress.  I teemed it with a sweet 1930's reproduction print for the pocket linings and I used orange top stitching for a bit of interest.


Cute!

Project details:
Pattern - Oliver & S Sunday Brunch skirt
Materials - heart printed denim from Spotlight, 1930's reproduction print
Cost - about $7 worth of fabric
Time taken - one hour
For the rest of the week I am hoping to sew a winter jacket for Emily, some comfy jeans for Isabella as well as recycling a couple of my tops into some sweet long sleeved ones for Juliette.  If I am super efficient, I might manage to make a Perennial dress for my niece's birthday and Isabella this Burda dress

Are you taking part in Kid's Clothes Week?  What are you making??

Sewing

My little peasant girl

March 10, 2013

I made this skirt for Juliette yesterday.  I admired an identical version made by my friend for her little girl, Olive - one of Issie's friends from kinder.  I loved the fabric and the style, so when I found a remnant of this printed corduroy at Spotlight for $2.00, I knew what I wanted to make from it.
It is a three tiered gathered skirt.  I made the pattern up, although there are many around - including one in the Japanese pattern book - Happy Handmade Volume II.  I didn't have access to the book so did some maths and measured up three long rectangles, then gathered and pieced them together.
 
No skirt here, just a this beautiful face.
 
I took photos along the way while I made this skirt and have worked out the ratio to make this style skirt for any size child or adult.  Would anyone be interested in a little tutorial and the dimensions to make your own?

Joining up here today. 

By the way, I am super excited as we ordered our first digital SLR camera last night on the net and it will be shipped super fast so will be here for my sister's wedding next weekend!! Yay.

Circle skirt

How to make a circle skirt

January 16, 2013


I have only posted a few tutorials on my blog and it has been ages since my last one.  So here is one for a fun circle skirt.

I made one for Juliette and Isabella.  The tutorial is for the skirt I made for Juliette (approx. 2 1/2 years).

You will need:
  • Fabric - twice your child's length (of skirt - measure from waist to desired hem line) plus an additional 15cm and hem allowance (1cm).  If you have very wide fabric, you may get the circle from just one length.  I purchased 80 cm of 112cm wide fabric to make a 30cm length skirt;
  • 1 inch wide elastic for waistband;
  • Cotton;
  • Pins;
  • Tailor's chalk;
  • String or wool (short length);
  • Measuring tape;
  • Scissors.
Note:  Vertical patterned fabric doesn't work as well in a circular skirt.  Avoid stripes:)

Method:
1.  Begin by measuring your lucky circle skirt recipient.... waist circumference and length you would like skirt to be.  A waist band will be added.  Measurement should include hem allowance of 1cm or less. 

2.  Fold your fabric to create a square.  This requires two folds.  a/ Firstly fold the required amount for length plus about 15 cm (east to west in this pic); b/ Then fold north to south.  The bottom left corner is the corner where the waist will be created.


3.  Now for a bit of maths....Divide your waist measurement by four.  Juliette measured approximately 53 cm around the waist so I got approx 13 cm (doesn't have to be to the millimetre). Cut this length of wool or string (ie. 13 cm).  Place the piece of string around the folded corner to create an even arc.  Trace around this with chalk.


4.  Cut around the chalk line.


5.  Keeping the fabric folded, measure the length you would like your skirt to be and mark this all the way around measuring from several progressive points around the cut arc.  See chalk mark in bottom right of this pic.


See chalked line which will become skirt hem.


Remove baby and kitten from fabric(!) and cut around chalk line.


6.  Unfold fabric and you will have a lovely neat circle with waist cut from centre.  The waist is quite deceiving, because although it looks small as a circle. when pulled in shape of skirt, the waist appears much bigger (this is just an optical illusion!)


See what I mean?  It is also partly due to the bias factor that arises from cutting a circle.


7.  Fold your skirt waistline so that is sits in a straight line.  Measure this, then double it and add 2cm.


8.  Cut your waist band piece using above measurement for length and at a width of approximately 9cm. Sorry for blurry pic.


9.  Fold this in half length ways with right sides together and sew (1 cm seam)  to create a loop.


Hello Rosie! (Our new nine week old kitten).  Very curious and affectionate!


10.  Pin waistband and skirt waist at quarterly intervals (find quarters by folding and pinning at opposite ends and then repeating).  See pic.


11.  Match up pins and secure skirt and waist band together. 


12.  Sew the band and skirt together with a 1cm seam.  I find it is best not to over pin for this part but rather to ease the sewing with your fingers and sew slowly.


13.  Once sewn, your skirt will look like this.  Iron your skirt at this point.  Iron the waist seam up toward the top of the skirt so that it is hidden by the waist band when folded and sewn.


14.  Overlock or zig zag top of waist band.  Pin waist band down matching upper edge of band with seam joining band to skirt.  I have shown this from the wrong side but I actually pinned it on the right side as I sewed it on right side to make sure it was neat.


15.  Sew 1 mm in from seam, going slowly along pins.  leave a 3cm opening in seam for elastic to be threaded through.


16.  Top stitch along top of waist band - this will give a nice finished look and prevent twisting of elastic inside the casing.

17.  Overlock and sew hem.  A very small hem only as it is a circle and will pucker if you try to sew a large hem.  Press hem.


18.  Feed elastic through hole and cut and required length to sit firmly around waist.


19.  Lay elastic as shown and sew several rows of straight stitch or zig zag.  Ease elastic back into waist band and sew opening shut.


You have finished!!


I made Isabella a skirt too...


 Isabella giving it some serious swirly action!


The girls will be wearing these outfits to my beautiful Dad's 65th birthday celebration in a fortnight. I have never seen Juliette so excited about an outfit as she is about this one for 'Nanpa's birthday'.   I relented yesterday post 'photo shoot' and let the girls wear their new skirts and tops for the day just to save the tears!  I have hidden them out of sight so they stay fresh and clean for the evening and the girls can do some proper swirly dancing!


Isabella's skirt is made from Denyse Schmidt Salty Aire daisy chain.  Juliette's skirt is made from The Florist Mannequins in blue.  Both were purchased from Spotlight - reduced to $8 per metre...love a bargain!

Linking up here today.